I used the handy dandy iPad to follow along with the instructions while I worked. Ripping the fabric into strips was messy, but sort of fun. This was something kids could definitely help with. I ended up with a big pile of strings doing it this way instead of cutting, but the point is to follow the instructions.
So far so good. Next step is to start wrapping.
I won't post a picture of that, let's just say that 8 hours, surgery and some fancy hardware later we made it home. Here is how I left my project. Fast forward to this morning and I was ready give it another go.
Yes my jammy pants are pretty sweet. My intent was to make a bowl with a flat bottom and straight sides. Here I am working on the bottom of the bowl. As it got bigger around I was able to get a better pattern going with regard to the parts that go over two layers of piping.
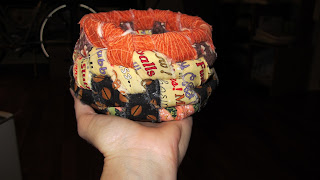
It turned out more beehive shaped than I was aiming for. The size is good and this was a fast project. I chose the colors to not show dirt since I don't think it can be washed. There are some spaces where I didn't wrap through two levels of piping often enough. This caused gaps like this one.
See my finger poking through there between the base and the side. Here is the bowl in use.
The hole isn't a problem for a bowl holding cat toys. The piping is cotton, but says dry clean only. I'm thinking it could be hand washed if need be. All in all the tutorial was good. The project was fast and turned out reasonably well. I think I will try it again and I think kids could do this project too. I couldn't really time it with all the starts and stops, but I would guess that a small bowl like this is a couple of hours start to finish. The bigger you make it the longer it would take, but as I found out it is a project that you could break up and do over the course of several days.
Next week I am thinking about trying to find a Halloween related craft. We'll see what I can dig up.


1 comment:
That is neat. Sorry about M's collarbone. Again - yeesh!
Post a Comment